

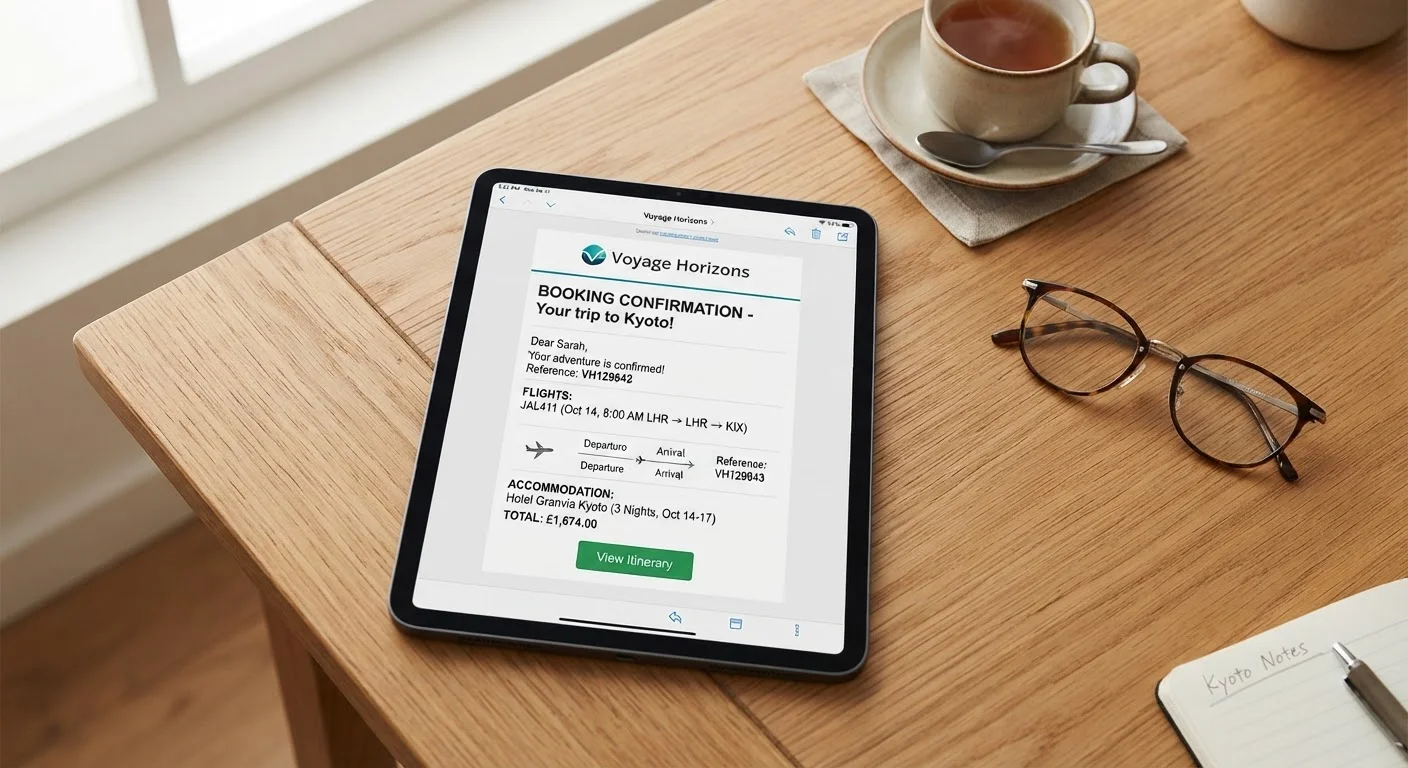
Key Takeaways
- Every booking confirmation contains at least six critical pieces of information you should verify immediately.
- Errors in names, dates, or room types must be corrected quickly — some changes become harder or costlier after 24 hours.
- Saving a printed or downloaded copy of your confirmation protects you if the email is later lost or deleted.
- Cancellation and refund terms are almost always buried in the confirmation — read them before you need them.
- Contact the booking provider directly if anything looks wrong; do not assume errors will self-correct.
What you will need
Why Confirmation Emails Deserve More Than a Quick Glance
Most travelers open a booking confirmation email, see that a charge went through, and move on. That quick scan misses the details that matter most — and errors caught early are far easier to fix than mistakes discovered at check-in or the departure gate.
A confirmation email is essentially your contract with a hotel, airline, or tour operator. It records exactly what was agreed to when you paid. Reviewing it carefully takes only a few minutes and can prevent real problems: wrong travel dates, a name that doesn't match your ID, a room type you didn't request, or a cancellation policy that's stricter than you expected.
Before you work through each step below, it helps to have already reviewed your booking details before paying. Our pre-booking review checklist walks you through what to check before you click confirm.
What you will need
How to Read Your Confirmation Email Step by Step
Follow these steps in order the first time you open a new confirmation email. Keep the email open on your screen, or print it out if that's more comfortable.
Locate and record your confirmation number
Every confirmation email contains a unique reference number — sometimes called a booking reference, reservation number, or PNR (Passenger Name Record for flights). It is usually displayed prominently near the top of the email.
Write this number down on paper and keep it somewhere accessible during your trip. You will need it if you call customer service, check in online, or need to make any changes.
Verify your name exactly as it appears
Compare the name on the confirmation against your government-issued ID or passport — character by character. A missing middle name is usually fine, but a misspelled surname or swapped first and last name can cause serious problems, especially at airport security or border control.
Check all dates and times carefully
Confirm the check-in and check-out dates for hotels, or the departure and arrival times for flights. Pay close attention to AM vs. PM and to dates that cross midnight. Also note the time zone — an international flight may show local departure time, which can differ from your home time zone.
If you booked a cruise, compare the embarkation date against your travel itinerary. Our cruise itinerary walkthrough can help you make sense of the full schedule.
Confirm the property, room type, or seat details
Hotels: Check that the room type matches what you selected — for example, a ground-floor accessible room or a king bed rather than two twins. Airlines: Verify your seat number and any special requests such as a wheelchair, extra legroom, or a meal preference. These details are easy to overlook but important for your comfort.
Read the cancellation and refund policy in full
This section is often in small print near the bottom of the email, but it contains some of the most consequential information. Look for: the deadline to cancel without penalty, whether the booking is fully non-refundable, and what happens if you need to change dates. Some bookings appear flexible during the checkout process but lock in once confirmed.
Verify the total charge against your bank or card statement
Compare the total amount shown in the confirmation email against what actually posted to your account. Watch for currency conversion if you booked an international property — the charged amount may differ slightly due to exchange rates, but a large discrepancy should be queried with your card provider or the booking company.
Save or print the confirmation for your records
Once you've verified everything, save the email in a dedicated travel folder in your inbox, download it as a PDF, or print a paper copy. Bring a printed copy with you on your trip as a backup — hotel front desks and airline agents can always work from a printed confirmation even if technology fails.
Act Quickly If You Spot an Error
Many booking providers allow free corrections within 24 hours of purchase — after that, fees may apply or changes may not be permitted. If you notice a mistake in your name, dates, or room type, contact the provider by phone or online chat the same day. Always ask for a corrected confirmation in writing before ending the call or chat session.
What to Do If Something Looks Wrong
Finding an error doesn't need to feel alarming. Most booking providers have a customer service line or online chat specifically for post-booking corrections. Act as soon as possible — within the same day if you can — because some providers have a short window (often 24 hours) during which changes can be made without penalty.
When you contact the provider, have your confirmation number ready and describe the specific error clearly. For example: "The confirmation shows a check-in date of the 14th, but I booked the 15th." Ask for a corrected confirmation in writing once the change is made.
Keep a Paper Backup for Every Trip
Technology is helpful, but printed copies never lose battery power or a Wi-Fi signal. Keep a small travel folder with printed confirmations for your hotel, flights, tours, and travel insurance. This simple habit has saved many travelers from stressful situations at check-in counters and airport gates.
For flight bookings specifically, name corrections are particularly time-sensitive. Airlines generally require that the name on your ticket matches your government-issued ID exactly. See our senior flight booking guide for more on what to verify before and after purchasing a ticket.
Once you've confirmed everything looks correct, store the email somewhere safe. Our article on keeping confirmation records properly explains simple habits that prevent bookings from getting lost in your inbox or spam folder.